How to Clean Your Car Interior Like a Pro
Share
Dust, pet hair, food crumbs, residue, strange odor. Sound familiar? If so, then it’s probably time to give your car interior some love. Cleaning the interior of your car is often overlooked. A clean cabin isn’t just a courtesy to your passengers, it helps extend the lifespan of the materials used. Good car care starts with keeping up with your vehicle inside and out, and learning about how to clean your car interior like a professional can help you maintain your vehicle and protect your investment.
Whether you use your car as a daily commuter, for work or for weekend use, keeping the inside of it fresh and clean is going to keep you and your passengers comfortable. Additionally, dirt, dust, and grime can accumulate over time and degrade the materials used in the interior.
Let 3D Car Care help you restore your vehicle’s interior to its former glory days when it was new. In this guide, we’ll go over all the tools you’ll need to get started and break down each step in detail. Say your last goodbyes to the lone french fry that’s been sitting under the passenger seat for 5 months. Let’s get started.
Car Interior Detailing Supplies
Never start a detailing project unprepared. Here’s everything you’ll need before getting started:
- Microfiber towels
- Medium bristle brush
- Soft bristle brush
- Vacuum with attachments
- Quick detail spray
- Leather, vinyl and plastic cleaner
- All-purpose cleaner
- Upholstery and carpet cleaner
- Glass cleaner
- Odor eliminator
- Air freshener
- Disinfecting wipes
How to Clean Your Car Interior: A Step-by-Step Guide
Once you’ve gathered all the car interior detailing supplies needed, it’s time to get started.
Step 1: Clean Up
First thing is first, you want to do a quick sweep of the entire interior. Get rid of anything loose trash and personal items before the cleaning process. This makes cleaning the interior much easier. Throw away anything you don’t need and hold onto whatever you need to put back in the car, like sunglasses.
Step 2: Floor Mats & Carpet
After removing all the trash from your car, pull the floor mats out. If you decide to clean your floor mats with a dedicated cleaner, be sure to do this step first so they have time to dry. Once the floor mats are removed, give them a shake outside to get rid of loose debris. Using a vacuum on the highest suction setting, vacuum the entire floor mat. Repeat this step for all floor mats your vehicle has.
If a shake down and vacuum job isn’t enough to clean the floor mats, you may need to use a dedicated carpet cleaner to get the job done. Using 3D Upholstery & Carpenter Shampoo will help get rid of odors and stains. It can be used with a brush, or by hand and microfiber towel.
If your mats are non-carpeted, like those made from rubber, silicone, or vinyl, you can simply use water to wash away excess dirt and grime. If the rubber mats are heavily soiled, then using 3D All-Purpose Cleaner will help achieve a deeper clean. Again, this can be done with or without a brush.

Step 3: Vacuum Interior
With the floor mats done and out of the way, vacuum the entirety of the interior including carpet flooring, cup holders, in between the seats, the seats themselves, etc. For the hard to reach areas, use the vacuum attachments that can get into tight crevices.

Step 4: Dust & Disinfect
The vacuum does a great job of picking up dust and debris, but it’s sometimes too big to fit into smaller areas, such as the dashboard. Use a microfiber towel or a duster to clear the dash of any dust, including inside the air vents.
The same process can be applied to the center console, infotainment system and cup holders. Be careful around these areas as some buttons, like the volume knob, may be sensitive. When wiping down the touch-screen (if applicable) use a dedicated microfiber towel and never use ammonia-based cleaners.
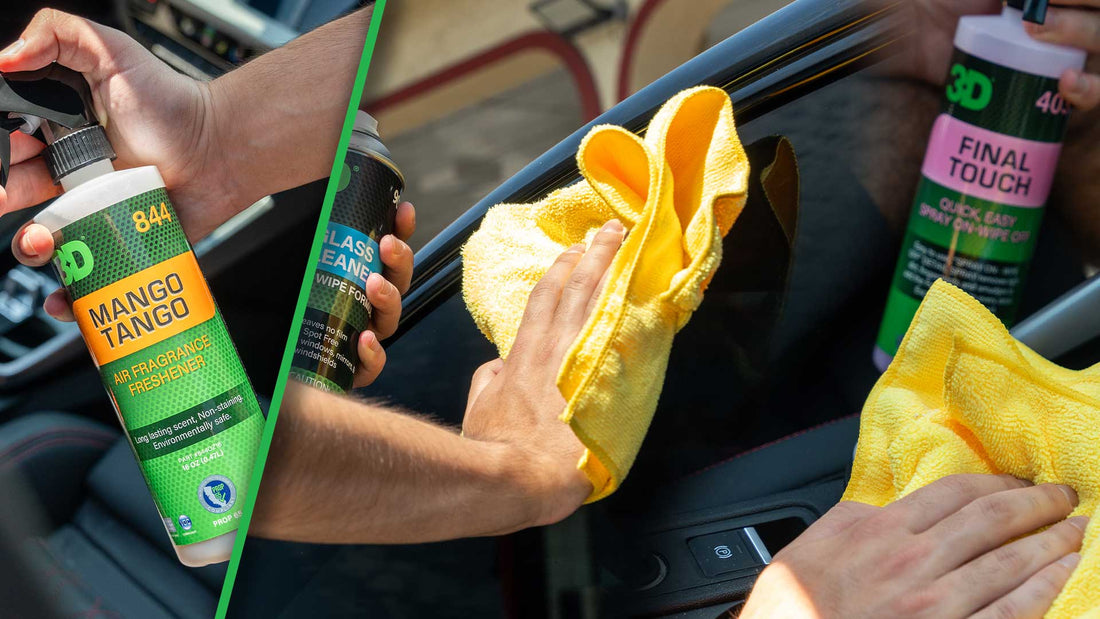
To clean your touch-screen infotainment systems, you can either use a dedicated screen cleaner, a lightly damped microfiber towel, or 3D Final Touch quick detail spray, which is what we prefer. Although Final Touch is a quick detailer, it’s totally safe on screen and won’t leave any streaks or marks. Additionally, Final Touch can be safely used on interior trims, like the infamous Piano Black trim that most manufacturers use.
Optionally, you could use disinfecting wipes to kill germs and bacteria that have been sitting on your dashboard for months. It’s also a good idea to use disinfecting wipes on high-touch surfaces, such as steering wheels, shift knobs and door handles. That said, make sure to read the product label carefully before using chemicals on these surfaces and avoid using bleach-based products. Regularly disinfecting these surfaces will keep your car interior clean and safe.

Step 5: Clean Windows
Next you’ll want to thoroughly clean the inside of your windshield and windows; and don’t forget the rear-view mirror. It should go without saying to never use a product or cleaner that isn’t designed specifically for cleaning glass. Using either a liquid glass cleaner or an aerosol glass cleaner, spray the windows and windshield. Use a clean microfiber towel and thoroughly dry the glass cleaner off the windows. 3D glass cleaning products use a streak-free formula, so you never have to worry about streaks and stains after cleaning.
Learn how to clean glass windows without streaks.

Step 6: Cleaning Car Seats
Cleaning car seats can be tricky, but using the right products will make the job super simple. Start by vacuuming any dust, debris or loose dirt off the car seats. If your seats are made from leather, then be sure to use an appropriate leather cleaner, like the 3D LVP Cleaner. Our LVP Cleaner is safe to use on real leather, vinyl and plastic. After cleaning, follow up with our leather, vinyl and plastic conditioner to keep your seats soft, supple and shiny.
Learn more about how to clean leather car seats.
If your car seats are cloth, then you’ll want to use a different set of tools and products. First, scan the seats and look for any stains that need to be eliminated. Use a high-quality upholstery cleaner, apply it to the entire seat. Using a scrub brush, agitate the product and work it into the seat for a deep clean. Once applied, rinse the product off using a clean microfiber towel and blot away the cleaner thoroughly. Try to work quickly and don’t allow the cleaner to soak too long in the seats. Once fully rinsed off, let the seats air-dry and you’re done.
Step 7: Neutralize Odors
Last but not least, it’s time to get rid of all those funky odors. There’s a few ways one can achieve this. You could use baking soda, activated charcoal, and air-fresheners. However, the best way to get rid of odors from your car is to use an odor eliminator.
Once you’ve used an odor eliminator to get rid of the smell, follow up by regularly using an air-freshener. Here at 3D Car Care, we highly recommend using a non-toxic water-based spray air-freshener, that doubles as an odor eliminator.
Repeat this process at least once a month, or as needed, to keep your car interior smelling fresh and clean.

How Often Should You Clean Your Car's Interior?
The frequency of cleaning your car's interior depends on your driving conditions and lifestyle. If you often transport messy passengers, such as children or pets, your car's interior may require more regular cleaning. In general, it is a good idea to deep clean your car at least twice a year. For example, you might clean your car at the beginning of every spring to wash away mud and road salt tracked inside during the winter. Clean it again at the end of summer to prepare it for the colder months.
How to Keep Your Car Interior Clean Longer
Once you’ve deep cleaned and sanitized your car’s interior, you’ll want to keep it clean and tackle any messes as they happen, rather than putting it on hold.
- Clean the insides of your windows and windshields monthly or as needed to improve visibility on the road.
- Disinfect high-touch surfaces often, especially during cold and flu season.
- Clean food and drink spills quickly after they happen to prevent bacteria and bugs from moving into your vehicle.
- Avoid eating food in the car, as it can be messy no matter how careful you are.
- Keep a duster or microfiber towel in the car to get rid of any dust and debris as they appear.
That’s all there is to it! Enjoy your fresh and clean car interior for years to come.

